The Beekeeper's DIY Honey Strainer
-Turning Honey Comb “Oops” into Liquid Gold.
Hey Busy Bees!🍯 Ever wondered how to turn those less-than-perfect honeycombs into liquid gold? Let’s talk about crafting a DIY honey strainer that works like magic and leaves you with pure honey goodness.
Gather Your Tools
Before we dive in, grab a few essentials:
- Food-grade buckets (they stack, they nest, they’re a beekeeper’s best friend.
- A paint strainer bag (elastic nylon – trust me, it’s a star).
- A wooden block.
- A bit of elbow grease and a dollop of creativity.
Bucket Magic
Opt for food-grade plastic buckets. Five-gallon ones are sturdy but heavy when loaded. If you’re looking for something lighter, four-gallon icing buckets are your sweet spot. And they’re usually free at local bakeries. Because can a beekeeper ever have too many buckets?
Volume Wisdom
Quick volume facts:
- A full shallow super fills a standard four-gallon icing bucket with honeycomb mash.
- About 3/4 of a bucket of honey drains from a full bucket of honey mash.
Let the Crafting Begin
-Assembling the Honey Strainer.
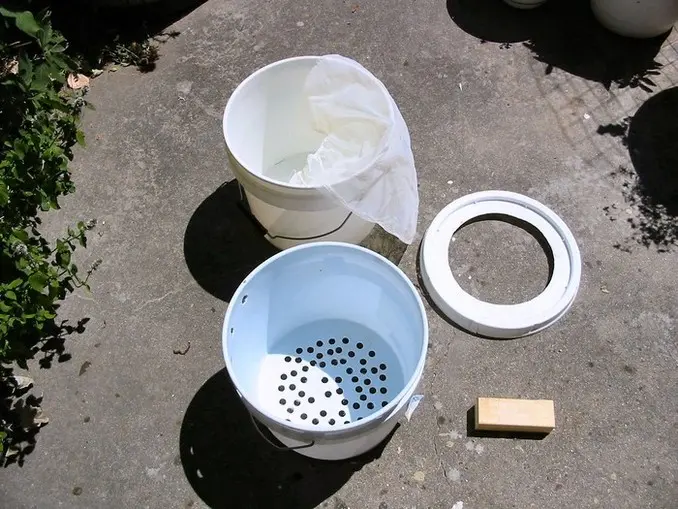
To build your honey strainer:
- Cut a large hole in one bucket lid (keep it several inches smaller than the strainer bucket’s bottom).
- Drill 3/4″ holes in the bottom of the strainer bucket.
- Drill a few 3/4″ holes around the top edge of the strainer bucket.
Assemble Your Creation
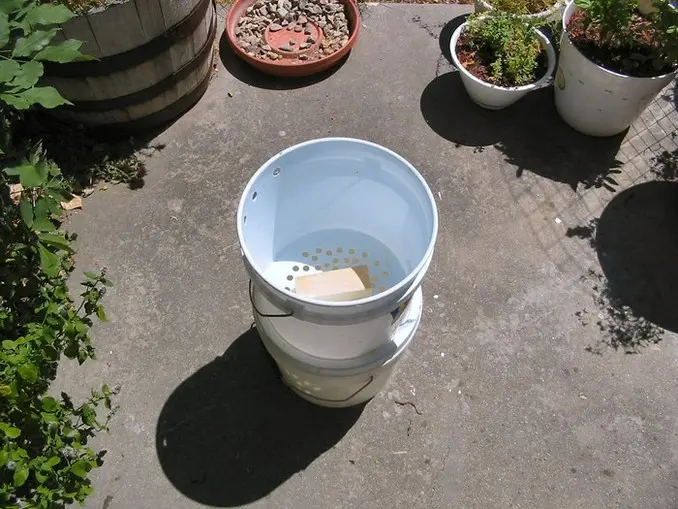
-Ready for Action: Assembled Honey Strainer.
Assembling is a breeze:
- Place an empty, clean bucket to catch the strained honey.
- Pop the lid with the large hole on top.
- Stack the strainer bucket (with tiny holes at the bottom) on the lid.
- Add the wooden block inside the strainer bucket (a key player in proper straining).
- Hang a nylon paint strainer bag inside the bucket (elastic band outside).
- Gently set a bucket lid on top of the strainer bucket.
Voilà! Your homemade top bar hive honey strainer is ready for action.
Honey Harvest Dance
Harvesting the Comb
Need tips on when and how to harvest? Check out the Harvest page for the deets.
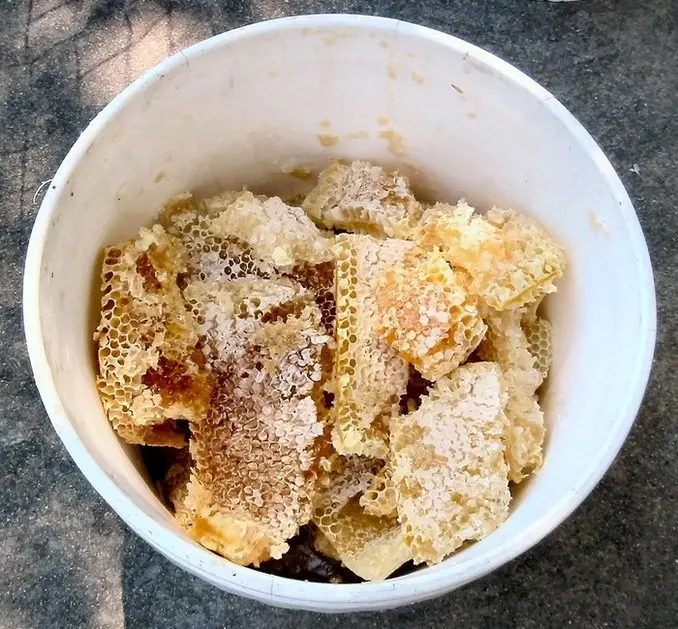
Once you’ve brushed off the bees from the harvested comb, cut clean, pollen-free comb into a compatible bucket. But don’t fill any bucket more than 3/4 full.
Why, you ask? Well, mashing a pollen-filled comb liberates the pollen. A small amount is fine, but if it’s mostly stored pollen capped with some honey, releasing the pollen can totally change the honey’s taste and smell. Not ideal if you’re not a fan.
Pollen-filled combs? Leave those for the bees.
Mash It Up
Mash the comb while it’s still warm from the field, creating a coarse pulp. A 3-foot, wooden 1x2 stick works like magic. And hey, use the same bucket the comb was harvested in – easy peasy.
Strain the Sweetness
Pour the honeycomb pulp into the strainer bag inside the top bucket. If the bucket is the same size as the strainer bucket, flip it on top and let it drain overnight.
Later, remove and loosely cover the strainer with a lid.
Pure Liquid Gold
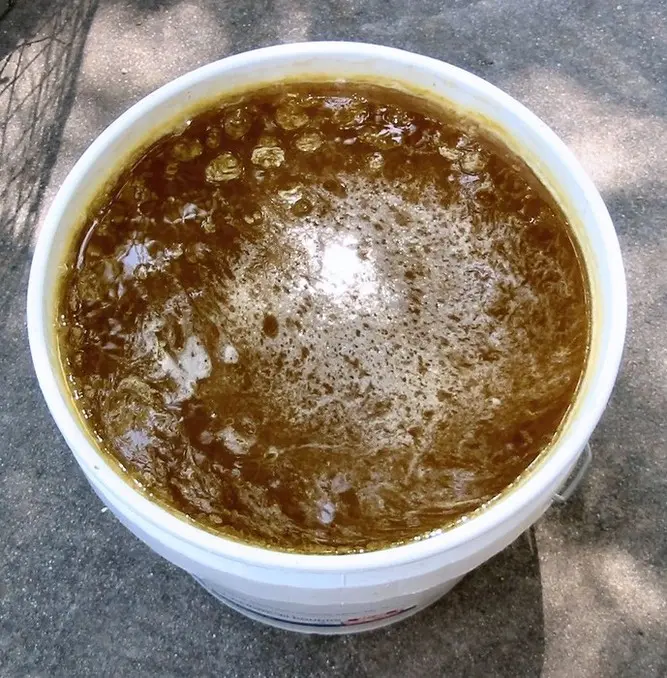
-Behold the Liquid Gold: Strained Honey.
After straining, you’re left with raw, flavorful honey. Only comb honey can outshine it. Plus, most of those lovely volatile compounds stay intact, making your honey extra aromatic.
Clean Up Act
Cleanup is a breeze:
- Fill the buckets with water.
- Place the paint filter in the bottom.
- Return the next day.
- Dump the buckets.
- Rinse with a hose.
And there you have it – no mess, no kitchen chaos, just a neat honey-making operation.
Pro Tips
Temperature Matters
Straining honey is a breeze above 80 degrees. Below 70? Not so much. So, harvest during summer’s heat – it’s almost labor-free!
The Shift
After a day of straining, gently lift the strainer bag a bit. This helps shift the wax and speeds up straining, especially in cooler weather.
Granulation Game
For fast granulating honey, strain when the weather is hot.
Crafting honey magic, one strainer at a time! ✨
-Cheers, D 🐝🤠