Beekeeping Unleashed
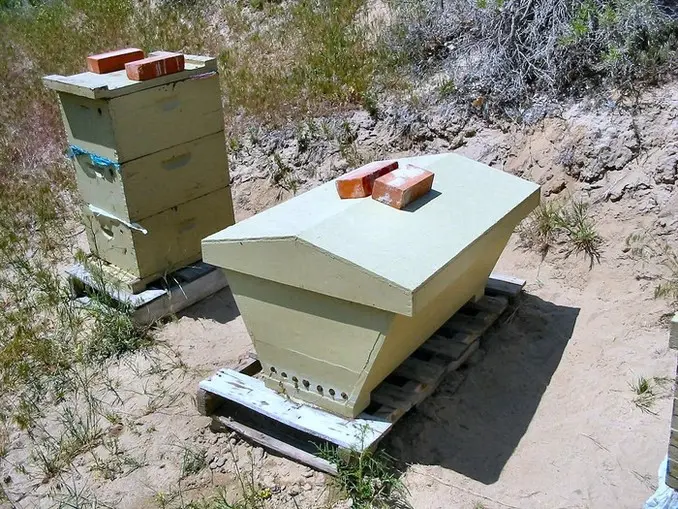
-Ready for some top bar hive magic.
Buckle up, bee enthusiasts! Today, let’s dive into the world of top bar hives.✨
Old Habits, New Buzz
Back in the day, my beekeeping journey kicked off in the fast lane, working for a commercial beekeeper surrounded by thousands of hives. It was all about speed, especially with some energetic bees in the mix. But transitioning to a top bar hive is like switching from a rock concert to a soothing melody. It takes time to master the delicate art of handling frameless comb.
What’s in Your Bee Bag?
So, we’re gearing up for some top bar hive action. Here’s your must-haves:
- A veil for that bee-chic look.
- A smoker to keep things cool.
- A serrated knife for precision moves.
- The yellow, plastic bristle bee brush.
- A clean bucket for stray comb.
- Your trusty top bar stand.
- Some water to stay hydrated.
- Hive tool.
- Bee gloves (optional, but they add a touch of drama).
Handy Hacks for the Hive
Two essentials for top bar hive aficionados:
- A water source for cleaning sticky tools and hands.
- And if your top bar hive is legless, a super or something comfy to sit on – because why not enjoy beekeeping while seated?
Yep, we’re all about beekeeping with a sprinkle of leisure.
Let’s Unveil the Magic
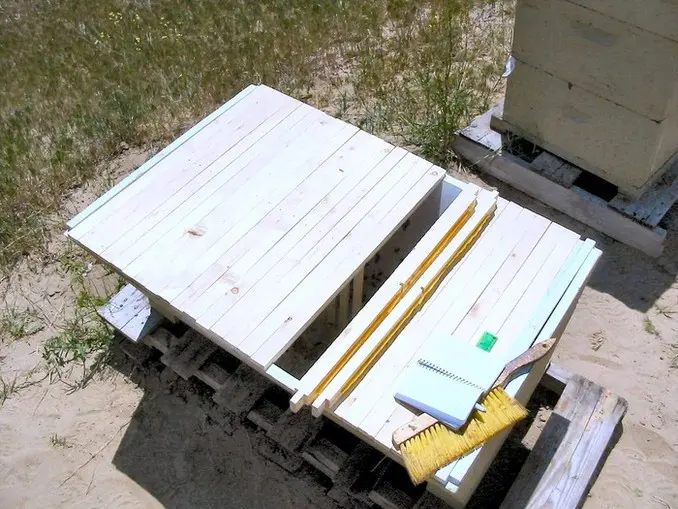
-Lifting the lid, revealing the hive’s secrets.
In the standard hive world, the beekeeper works near the entrance, attracting the guard bees. So, smoke becomes a frequent distraction.
In a top bar hive, we flip the script. The beekeeper starts at the far end, away from the entrance. Bees come and go, blissfully unaware of our hive-opening shenanigans. A gentle waft of smoke at the entrance – just a hint – and we’re in business.
Remove the cover, exposing the top bars. No wrestling with propolis or glued covers, and no need for a hive tool. Smooth moves, no jarring, no bees in your face.
Before we play Jenga with the top bars, keep tabs on their location and orientation. Number them or use a logical system to ensure they go back just the way they came out. It’s all about respecting the broodnest structure – keep it zen, and the bees will thank you with a quick recovery.
Starting behind the bustling bee cluster, towards the hive’s rear, remove the spacer cleat or a few empty top bars. This grants rear access to the comb, where top bars with comb are closer to the entrance.
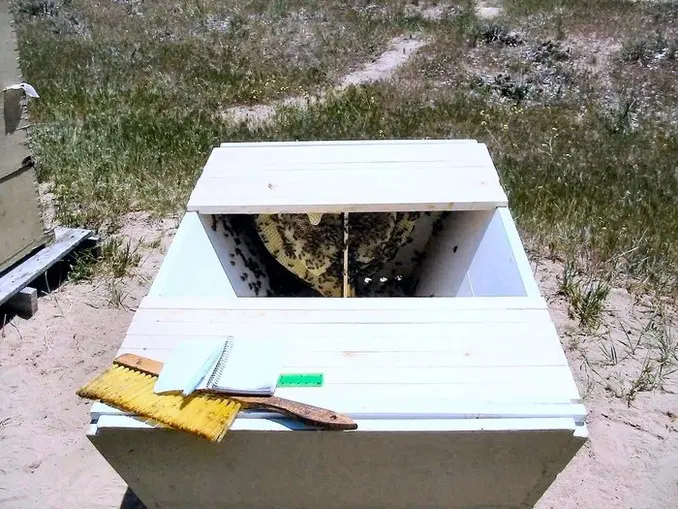
-Creating a sweet working space.
Gently push comb-less top bars towards the hive’s far end, creating a snug working space next to the rearmost comb. This narrow slot lets us access the comb without causing a buzz in the hive interior.
A small open area is all we need to inspect a top bar hive. Most bees carry on with their work, limited flight buzzing out of the narrow opening. Unlike the chaos in standard hives when larger areas are opened, causing bees to retreat to the safety of the dark broodnest area towards the hive’s front.
Snip and Slide
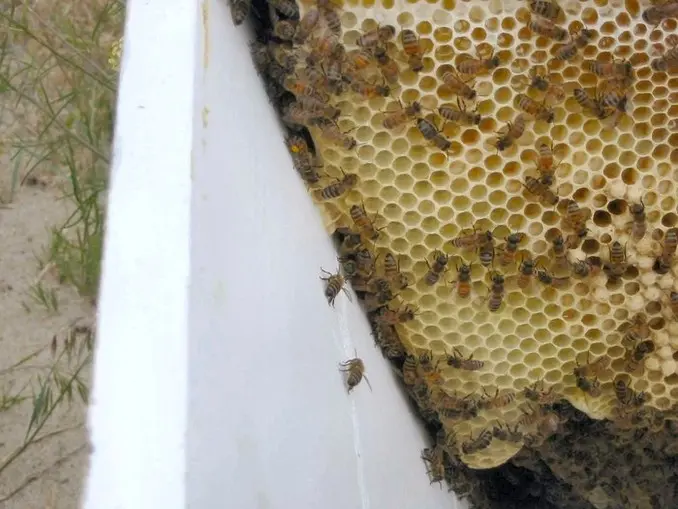
-Gently cutting loose an attached brood comb.
Bees have a thing for attaching comb to the sidewalls, and while attachments are their support system, we need to snip them before moving any top bar or comb. It’s like their umbilical cord, but a gentle snip ensures no comb casualties.
Ditch the hive tool; a serrated knife is our weapon of choice. Move from the bottom of the comb upwards, avoiding the sawing motion that stresses the comb. It’s more of a slow dance – let the knife ‘melt’ its way through the comb. No pulling backward, just a smooth withdrawal. Beekeepers get creative; someone even crafted a comb-cutting wizard from a stainless steel auto radio antenna!
After the attachments are cut, resist the urge to scrape them off the hive’s sides. When the comb goes back, the bees swiftly repair the attachment and reinforce the comb.
Bee Brush Ballet
When it’s necessary to brush bees off a comb:
- Always reach for the yellow, plastic bristle bee brush
- Keep it clean and stick-free
- Brush the bees off the face of the comb before cutting any attachments
- Use short, quick strokes towards the bottom of the hive, and watch them gracefully retreat towards the darker hive front.
Top Bar Liberation
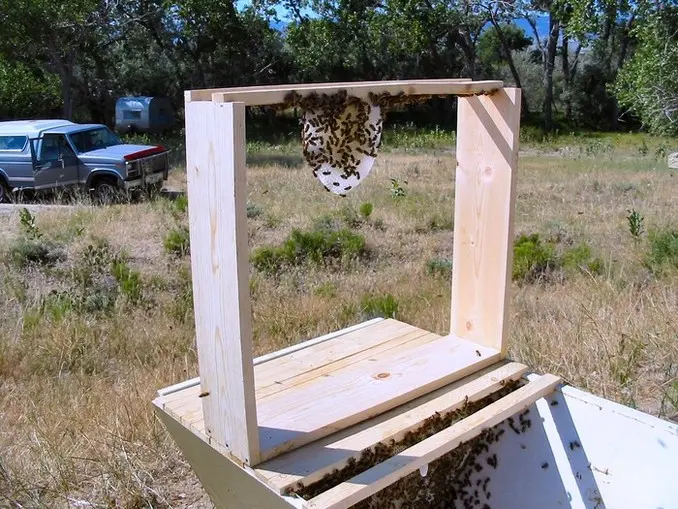
-A top bar stand with its companion.
Once a comb is liberated from all attachments, the top bar is our partner in a slow separation from its neighbor and a gentle exit from the hive. No yanking, though – that abrupt acceleration could spell trouble for a heavy comb.
Keep the comb’s plane vertical. Instead of holding on like with a standard frame, let the top bar ends rest freely in your hands, swaying naturally. This minimizes stress on the comb.
After inspecting a comb, gently lay it down in a free space towards the hive’s far end or use a top bar stand – a beekeeper’s trusted companion. But beware of the wind; it can add a fluttery stress factor, especially with new, hot, and heavy honeycomb. If the hive is healthy, it’s often best to let such comb be for a season.
Nesting the Bars
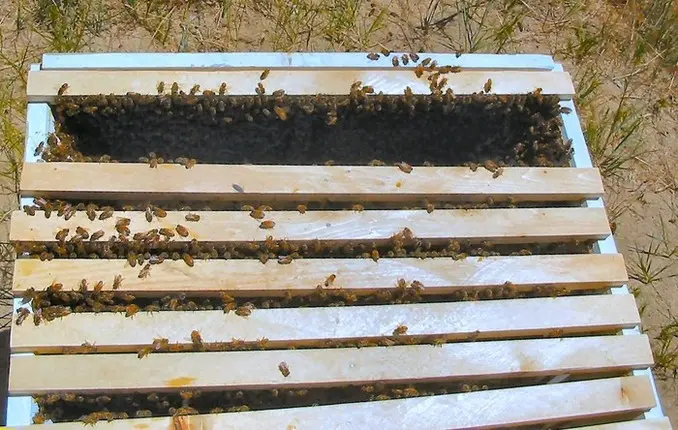
-No bee space between these top bars.
To maintain the broodnest harmony, keep the top bars in the same position and orientation when placing them back in the hive. Some beekeepers number the top bars, so they don’t get tangled in a bee ballet.
Top bars must be set down gently and slowly. A heavy comb dropped in place might sound like a drumroll, but the sudden stop can be a comb’s demise. Take your time, let the bees clean up any exposed honey, and gracefully move out of the way. Remember, only a despot squashes the workers that feed him, and who knows, one of those worker bees could be the queen.
Unlike standard frames, top bars cozy up with no bee space between them. Quick or careless placements can result in bee casualties. Once the hive is closed up, the bees lose access to these areas, and the crushed bees become a grim sight at the next inspection. Let’s keep it graceful, not hasty.
Bee-Down Strip Ballet
Inserting a bee-down strip between two top bars solves this problem. The thin strip gently herds the bees beneath the top bars. Remove the strip, and the bars come together like a ballet finale.
Other Elegant Methods
There are other methods to avoid bee-squishing drama. One involves a more horizontal approach, gradually creating a V-shaped space and letting the bees escape before closing it. The second method is more vertical, swiftly sliding the top bar down, creating a smooth path for the bees. Smoke might move the bees, but it seems as many scurry into trouble as scurry out of the way.
When Not To Open It
Have you checked out Heat Precautions? It’s a must-read before cracking open a top bar hive on scorching days.
Failed Comb?
Encounter a failed comb? Dive into the Failed Comb page for insights.
Happy buzzing, everyone! ✨
-Cheers, D 🌸🐝
